Creating Projects and Folders in VSTS
Microsoft Visual Studio Team Services (VSTS) allows you to create a repository for storing and managing your source code (software application) as well as a place that your team can plan, collaborate, upload related documentation and track the progress of your project. Within each project all the source code and related files are isolated from all other projects which helps with the management and collaboration of that project.
- Once you’re in Visual Studios Team Services select “Create project”

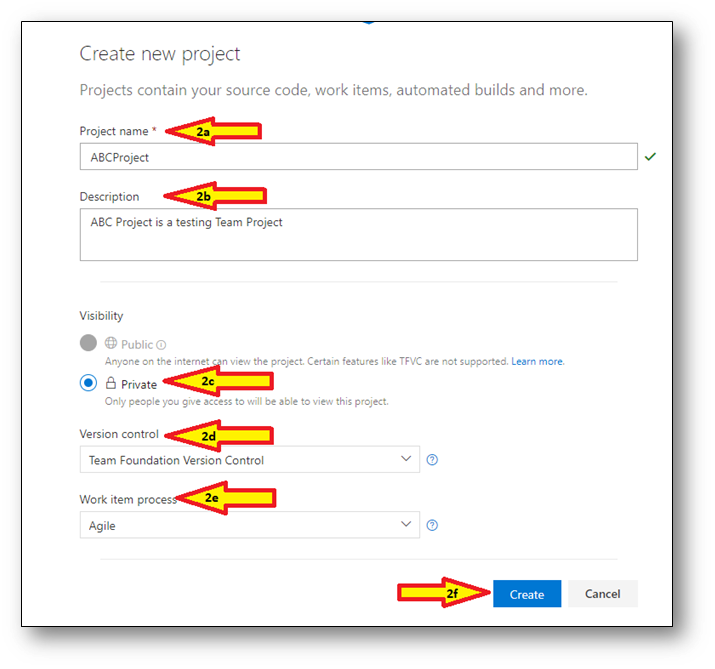
2. Enter the Team Project information
- Project name – Enter the name for the project
- Description – Enter a short description for the project
- Visibility – Leave as Private so that only the users you give access will be able to view the project
- Version control – Select Team Foundation Version Control
- Work item process – Select Agile as the process
- Submit – Select “Create” to generate the Team Project

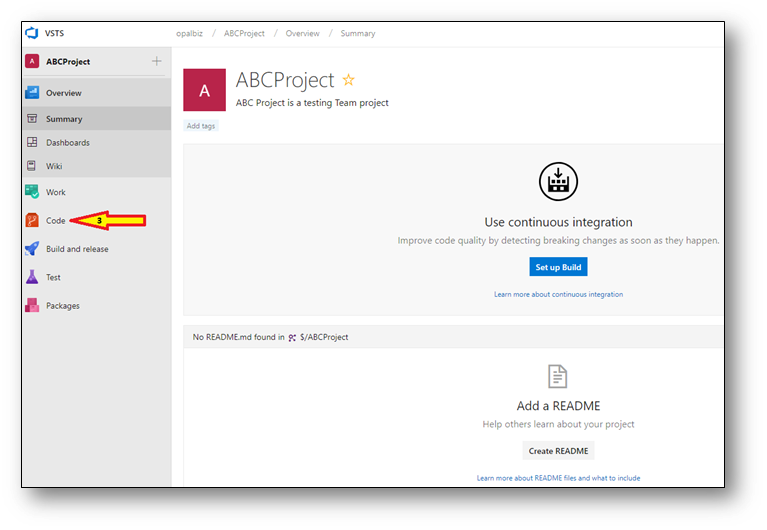
3. After the new Team Project is created, select “Code” to add a folder to the project for storing project related files such as web, console application, or windows project, SSRS files, or Scripts (SQL, VBA, JavaScript, Command Prompt, Windows Powershell, etc.).

4. Select “New > Folder” to add a new folder for storing the project files.

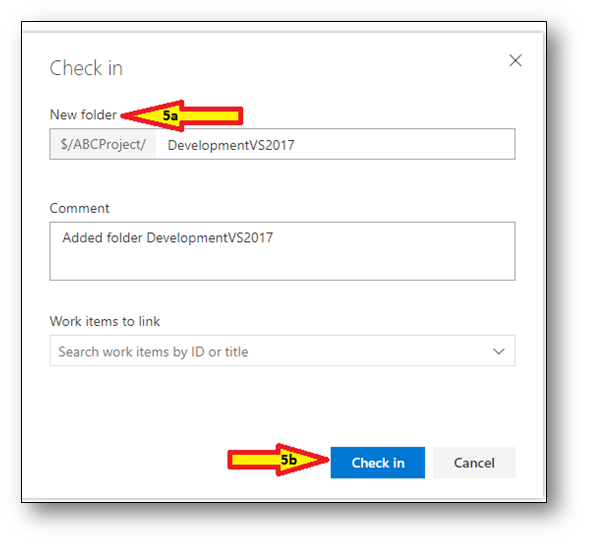
5. Enter the Folder information
- New folder – Enter the name for the folder that will be storing the files. For example, for source code solutions you can enter “DevelopmentVS2017” or for other none source code solution files you can enter “RelatedFiles”.
- Submit – Select “Check in” to generate the folder.

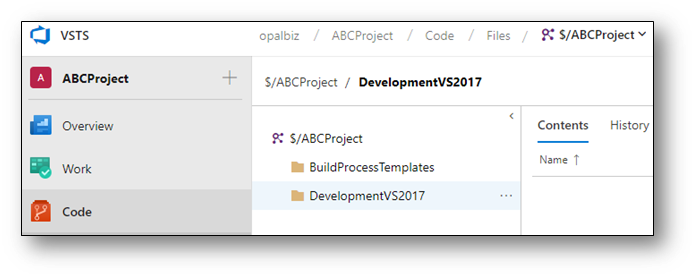
6. Now you can select and add source code solutions or related files to the new Folder in the Team Project.


