
Today, we’re going to go over a streamlined method in which you can import excel files into Business Central using an Excel Buffer table. In this guide, you can expect to learn how to build out your own custom page for importing data from an excel file. It’s worth it to note that while this example includes customer data, this method can be used for virtually any type of data. But– without further ado, let’s get into it.
Step 1: Defining the Data Record table
Define a new table to organize the imported data. For this example, we’ll set up a CustomerRecord Table.

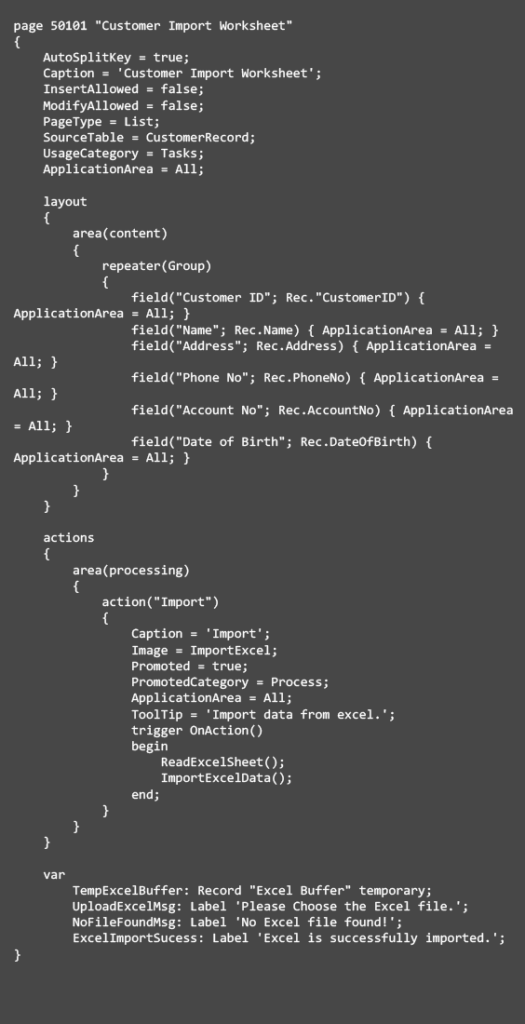
Step 2: Defining the import worksheet page
Define a new page to function as the import worksheet. This page will display the data and include an action to import the Excel file.
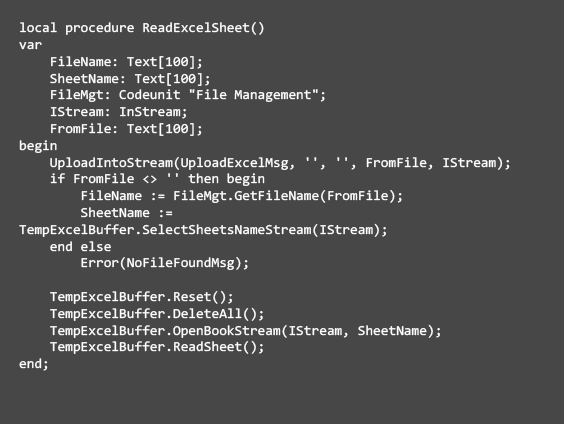
Step 3: Read the Excel Sheet
Develop a new procedure to read the Excel file. This entails uploading the file, choosing the sheet, and loading the data into the Excel Buffer.
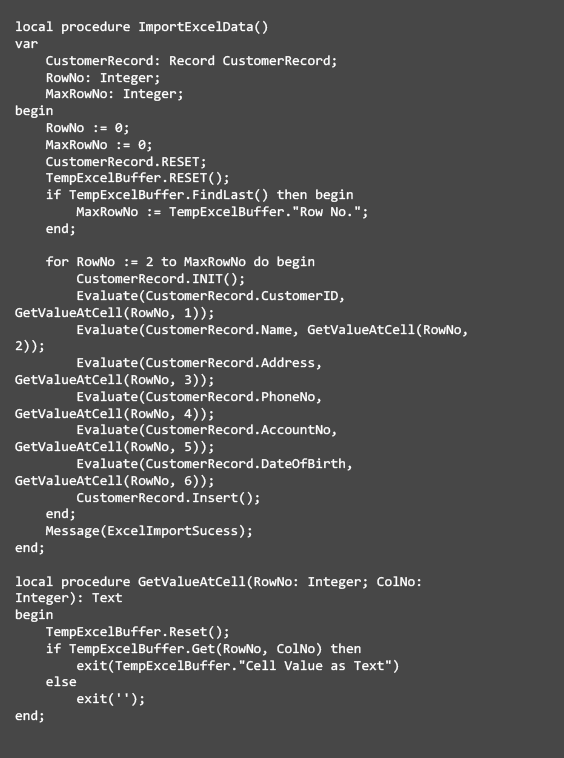
Step 4: Importing Excel Data
Once the Excel sheet is read, map the data to the relevant fields in your table and insert the records accordingly.
And just like that, you’re ready to import excel files into Business Central using an Excel Buffer table! This example highlighted customer data, but you can apply the same methodology to any type of data by adjusting the table and page definitions according to your needs.