By Emma Thomas, Microsoft Dynamics Consultant
Form Security
If you’re looking to have separate forms according to specific user roles, you’ll want to take advantage of Form Security. You can restrict access to certain forms based on a users role, or other criteria.
- Define which security role will need access to a specific form
- Find your entity/table form – for this example, we’ll use Account
- Define the Permissions: Define the permissions for each form. You can choose to allow read access, write access, or both. You can also specify who has access to each permission.
- Assign the Role: Assign the security role to users or teams. You can assign the role to individual users or to teams
Go to Advanced Settings > Customizations > Account form > Enable Security Roles

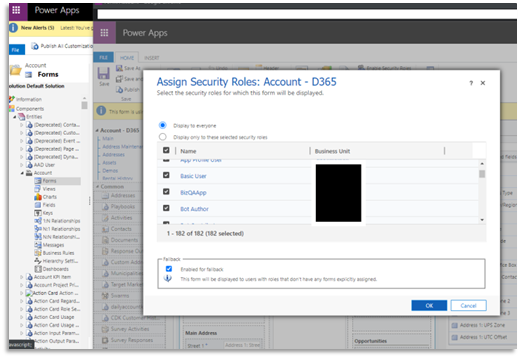
It’s important to test thoroughly with different users and roles to make sure that everyone has the correct level of access.
Field Security
Field security is an important aspect of managing data in Dynamics 365, as it enables you to control who can view or edit specific fields in a record. This means that you can specify which users or teams can view or edit a particular field. This is useful when you want to restrict access to sensitive data or ensure that only certain people are able to make changes to specific fields.
Every field in the system contains a setting for whether field security is allowed.
- Find your entity/table and select which field will need field security access
- Open the field that you want. If Enable can be selected, the field can be enabled for field security.
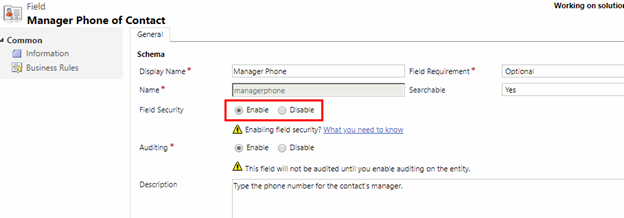
Security Profile:
A field security profile is a security feature that controls access to specific fields or data within a record. It’s used to ensure data privacy and compliance with regulations such as GDPR or HIPPA. These profiles are managed by System Admins or Security Roles and can be set up at the organization, business unit or individual record level. The Security profiles are used to set what field security belongs to what security profile.
- Sign into Power Apps
- Click Dataverse > Tables
- Find the table (entity) where the field lives
- In this example, it’s ‘Account’
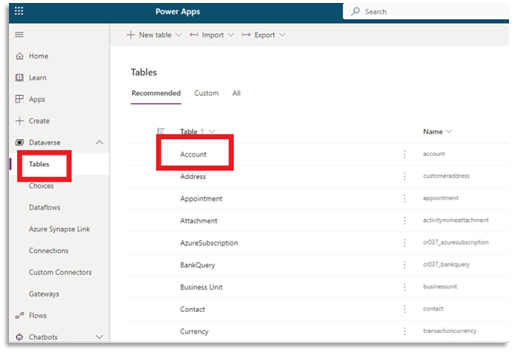
Click on Schema > Columns (Fields)
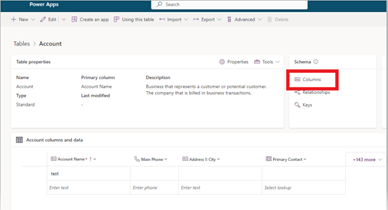
Find your field
- In this example, it’s ‘Email’
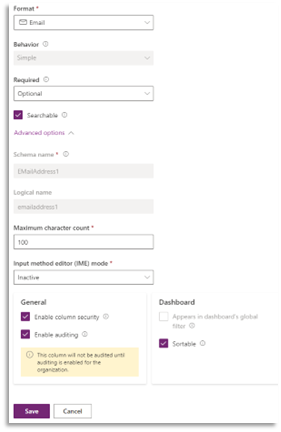
Next, you’ll have to configure the Security Profile
- A field security profile is a collection of field-level security privileges that you can assign to users or teams
- Go to Advanced Settings
- Customizations
- Field Security Profiles
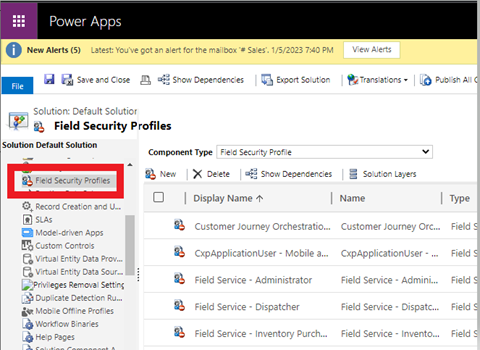
Select the Entity: Select the entity for which you want to set up field security. You can choose from standard entities like Accounts, Contacts, or Leads, or you can create a custom entity.
Choose the Fields: Select the fields that you want to secure. You can choose individual fields or groups of fields. This will come from the ‘field security’ field (that was mentioned previously)- it must be set to enable

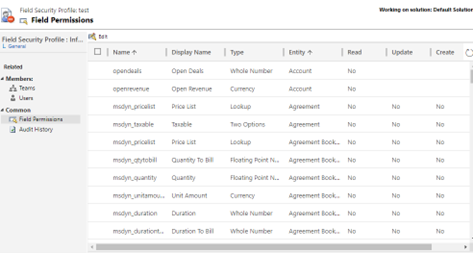
Define the Permissions: Define the permissions for each field. You can choose to allow read access, write access, or both.
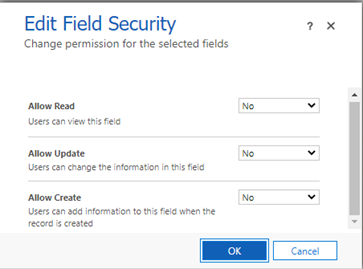
Assign the Profile: Assign the field security profile to users or teams. You can assign the profile to individual users or to teams.
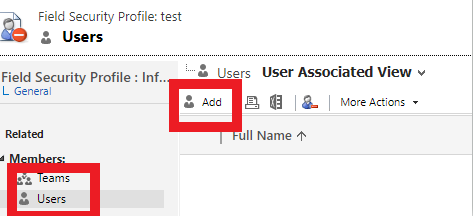
Save and Publish
Field Security is an important aspect of managing data in Dynamics. With Field Security Profiles, Admins can control who has access to sensitive data. It’s important to test thoroughly with different users and roles to make sure that everyone has the correct level of access.
If your team has any questions about Microsoft Dynamics, our Dynamics team at Opal Business Solutions will be happy to help.


